Adobe Illustrator contains a wide variety of tools and features, and has somewhat of a steep learning curve. The best way to learn Illustrator is to start at the very beginning.
Start a new workspace by going to File > New
Here, you will choose the size of your document, the number of art boards, and other options such as color mode; all of which can be revised later. Common screen sizes for mobile devices can easily be found through a quick search, as well as dimensions and guidelines for Facebook cover photos.

Selection Tool (V)
The first keyboard command you should keep in mind when you start using Illustrator is (V). By pressing V, you can return to the normal selection tool; your cursor.![]()
Direct Selection Tool (A)
Next to the normal selection tool, there is the direct selection tool. ![]() The keyboard command for this tool is (A). This tool allows you to select anchor points on an object, rather than the entire object itself. You can then manipulate the object as you please.
The keyboard command for this tool is (A). This tool allows you to select anchor points on an object, rather than the entire object itself. You can then manipulate the object as you please.
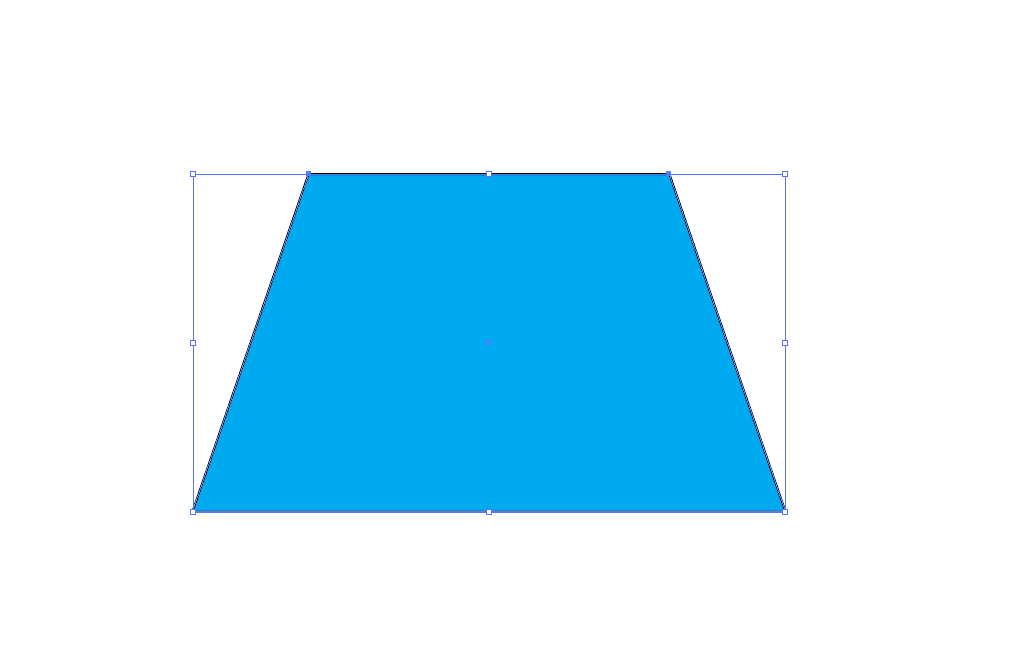
Anchor points are found on an object anywhere that there is a change of direction. For example, here, I am using the direct selection tool to change a rectangle into a trapezoid by selecting individual anchor points and moving them inward. I have used the rectangle tool to create this shape, which will be discussed further on. The small circle in the top left corner of the rectangle indicates that I have selected that anchor point.

Now, using the X-coordinate box, I will change the X coordinate of the anchor points to ensure that the shape is perfectly symmetrical. This can be found at the top of the screen in the toolbar.
![]()
Here is the end result after moving both X-coordinates 100 points inward:
Angles & Curves
We can also manipulate anchor points to make them into curves, as opposed to angles. To do this, we select the anchor point with the direct selection tool (A), then navigate to the toolbar above. On the upper lefthand side, there is the option to “Convert” with an image of a curve, and an image of an angle. When we select the curve, the anchor point becomes a curve, while the rest of the points stay the same. 
Here is the result:

To convert the point back to an angle, simply undo the action (Ctrl-Z on Windows, Cmd-Z on Mac) or select the angle from the “Convert” options. The two lines extending from the anchor point are called Handles, and can be used to adjust the curve. To do this, we will use the Direct Selection tool to select the point at the end of the handle, and by moving it around, the curve can be warped. The handle is circled in red below:

Pen Tool (P)
The next basic tool that we will use is the Pen Tool. The keyboard command for this is (P).![]()
This tool has many uses, one of which being shape creation. The pen tool will create a series of connected lines. Once the original anchor point is connected, the shape has been created. Start by creating an anchor point anywhere on the art board. The next point that you create with the pen tool will connect to the first. Here is the result:

Now we can continue creating lines with the pen tool until the desired shape is created. To finish the shape, select the original anchor point that we started with, and a line will be created between the last anchor point and the first. Here is an example:

As mentioned before, the anchor points can be manipulated. By selecting them with the Direct Selection Tool, we can convert angles into curves, relocate points on the shape.
Rectangle Tool (M)
The Rectangle Tool is used for making squares and rectangles. The keyboard command is (M). To create a rectangle in the art board, simple click on an area and drag outward to create the shape. To create a square, hold down on the Shift key, and as you drag outward, a square will appear and will scale accordingly.
If you hold down on the Rectangle Tool, additional options will appear.
Underneath the rectangle tool, you will see the Rounded Rectangle Tool. To create a rounded rectangle, click and drag outward as you would for any shape, OR click once anywhere on the screen to bring up a menu of options for this shape.(height, width, and corner radius).
Ellipse Tool (L)
The Ellipse tool is a shape building tool like the rectangle tool. The keyboard command is (L). To create an ellipse, use the same process as you would with the Rectangle Tool. To create a perfect circle, you will also use the same process as with a square: hold down the Shift key while you create the shape.
Type Tool (T)
The Type tool is more self explanatory than the other tools, as we see it in commonly used programs like Powerpoint and Word. It allows you to add text to your illustration. To start, select the Type Tool and click anywhere in the art board to bring up a text box. You can edit the appearance of the text itself using the toolbar at the top of the window. You can add a stroke and a fill to the text, change the font, style, and size. The effects menu will let you manipulate the text more; you can warp it, bulge it, stretch it, and more.
The fill and stroke can be adjusted using the drop-down menus at the top left corner of the screen: ![]()
The Polygon Tool
Similar to both the ellipse and the rectangle tool, the polygon tool allows you to make a polygon with as many sides as needed. To adjust the number of sides, toggle the up and down arrow keys as you create the shape.
The Star Tool
The star tool does not have a keyboard shortcut either. It functions similarly to the polygon tool; you can adjust the number of points on your star by toggling the up and down arrow keys.
With these tools, you should be able to create quick and easy logos, cover photos, business cards, posters.. the possibilities are truly endless! The software will become quite intuitive in time, so spend some time browsing through the different effects, and before you know it, you will achieve mastery.