You may have noticed that the Help Center provides instructions for making your UDrive easily accessible on your desktop PC and Mac on our website, but, what if you’re running a Linux distrubution? Not to worry! By taking the following steps, you’ll soon be able to back up and shuffle around your important files with ease. Below are instructions for setting up your UDrive with Ubuntu 12.04 LTS. While following the steps, click on images to enlarge for details. It takes a few Terminal commands, but you’re already using Linux, right? You’re not afraid of those!
First, you need to install/make sure you have installed the davfs2 package. This is what will allow your computer to communicate with UDrive, and let you mount your personal UDrive as a folder that you can read and write to. Enter the command as follows:

You should get one of two messages after you press enter. First, either a listing of what was installed, or an error saying that the package is already installed, both of which mean you’re good to go!
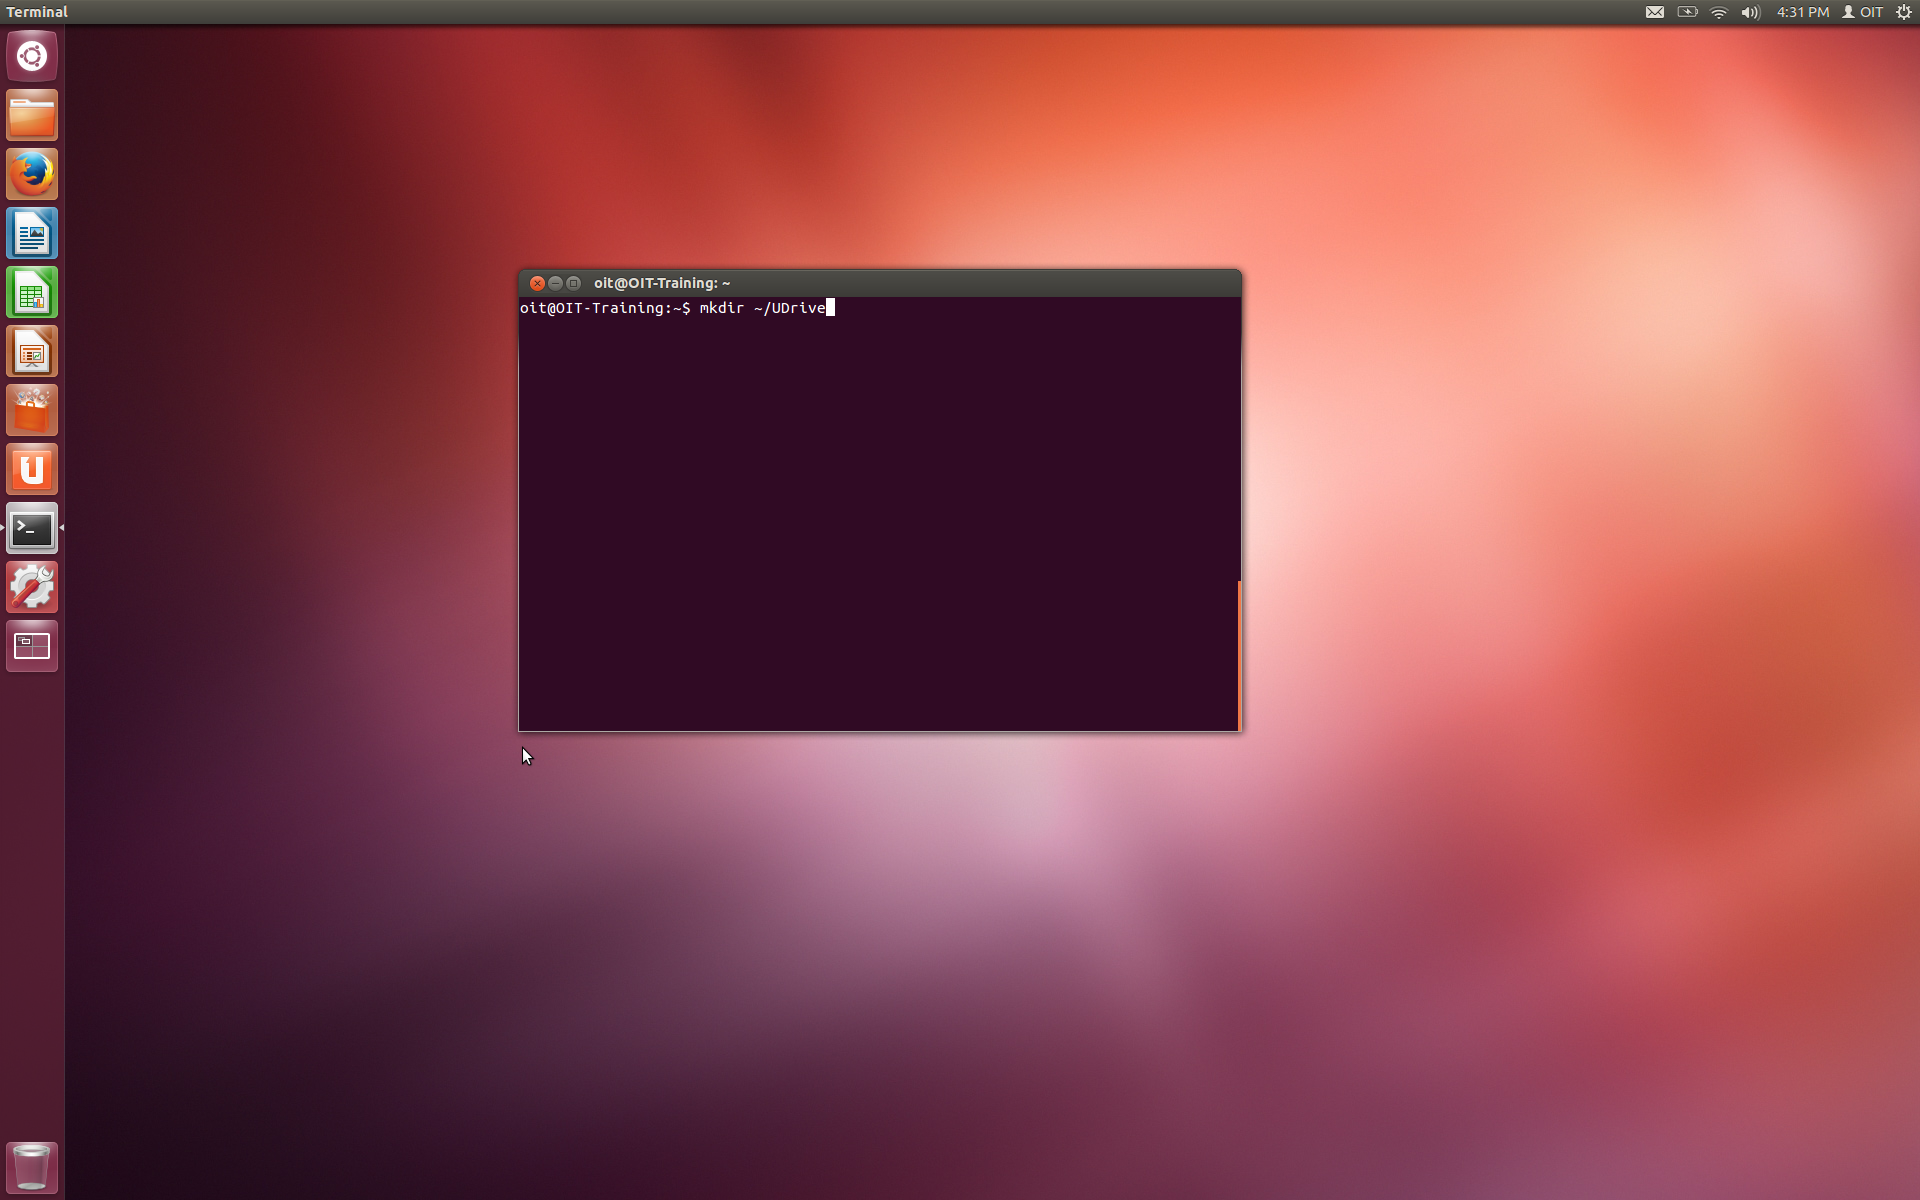
Now, you can proceed to mount your UDrive as a directory on your machine. First, you’re going to have to create a directory to use as the mount point. The following command creates a directory called “UDrive” in your user account’s home folder, though you can name it anything, and make it anywhere you’d like.
Next, you can mount your UDrive to this folder by entering the following command, replacing my NetID with your own in both “uid=…” and the URL for your UDrive.

Next, you will be prompted to enter your username (your NetID):

Followed by your password:

Now, if you open your Home folder, you should see your UDrive directory (we’ll get to the lock icon in a second) like so:

And if you open it up, you should see the contents of your UDrive!

As for the lock icon, if you try to drag and drop anything to your UDrive, you may get this alarming error:

Why don’t you have permission to copy things to your own UDrive?! What gives? Well, it turns out, that the “owner” of the UDrive folder is denoted by your NetID, so if your computer username is different (which it probably is), you won’t have permission to upload any files or directories to your UDrive by default.
However, there are several workarounds for this, the first of which is more suited to people who use Terminal for everything anyway. We used rsync as an example, but if you use any copy command with root privileges (add sudo before it), you’ll be able to upload without issue!
Command:

Result:

If you don’t use Terminal for everything, never fear! All you need to do is change the permissions of the directory, and you can drag and drop to your heart’s content! Simply replace the file path (~/UDrive) with the file path you used for your mount point, and use chmod as shown:
sudo chmod -R 777 ~/UDrive
Finally, all that remains is to unmount your UDrive, which can be accomplished simply with the following command:

So there you have it! The complete, and only somewhat arduous process of mounting your UDrive as a directory in Ubuntu. As a bonus, if you made all the way down here, here’s a primitive script for automating this process!
#!/bin/bash

sudo apt-get install davfs2

echo "Specify a directory name:"

read dname

sudo mkdir ~/$dname

echo "Enter your NetID:"

read uname

sudo mount -t davfs -o rw,uid=$USER https://udrive.oit.umass.edu/$uname ~/$dname

sudo chmod -R 777 ~/$dname

exit 0
Copy and paste it into your text editor, save it as a .sh file (shell script), use chmod to change the permissions to 755, and then run it!