Want to develop an iPhone app? How do I start?
First, If you want to develop anything about Apple, you need a Mac. The only IDE(Integrated Development Environment) for developing apps on Apple platform is Xcode. Xcode is compatible with OS X and doesn’t support Windows. If you want to be a good programmer, starting with swift programming is a pretty good idea. Swift is a powerful and intuitive programming language for macOS, iOS, watchOS and tvOS. Writing Swift code is interactive and fun, the syntax is concise yet expressive, and Swift includes modern features developers love. Swift code is really easy to understand and produces software that runs lighting-fast. You even can learn Swift on iPad. Swift Playgrounds is a revolutionary new iPad app that helps you learn and explore coding in Swift. Built-in lessons and challenges teach fundamental coding concepts as you write real Swift code in an interactive environment designed for touch.


Basic syntax of Swift
Constant and Variables
Constants and variables associate a name (such as maximumNumberOfLoginAttempts or welcomeMessage) with a value of a particular type (such as the number 10 or the string “Hello”). The value of a constant cannot be changed once it is set, whereas a variable can be set to a different value in the future.
letmaximumNumberOfLoginAttempts = 10
varcurrentLoginAttempt = 0
This code can be read as:
“Declare a new constant called maximumNumberOfLoginAttempts, and give it a value of 10. Then, declare a new variable called currentLoginAttempt, and give it an initial value of 0.”
In this example, the maximum number of allowed login attempts is declared as a constant, because the maximum value never changes. The current login attempt counter is declared as a variable, because this value must be incremented after each failed login attempt.
Functions
When you define a function, you can optionally define one or more named, typed values that the function takes as input, known as parameters. You can also optionally define a type of value that the function will pass back as output when it is done, known as its return type.
Every function has a function name, which describes the task that the function performs. To use a function, you “call” that function with its name and pass it input values (known as arguments) that match the types of the function’s parameters. A function’s arguments must always be provided in the same order as the function’s parameter list.
The function in the example below is called sayHello(_:), because that’s what it does—it takes a person’s name as input and returns a greeting for that person. To accomplish this, you define one input parameter—a String value called personName—and a return type of String, which will contain a greeting for that person:
funcsayHello(personName: a href=”” String /a ) -> a href=”” String /a {
letgreeting = “Hello, ” + personName + “!”
returngreeting
}
Create a simple iOS app
1. Open Xcode and go to New -> Project

2. Select Single View Application and click Next. Then you can set your project name, your team name and language etc. Click Next again, and you should be all set to start creating a iOS project.
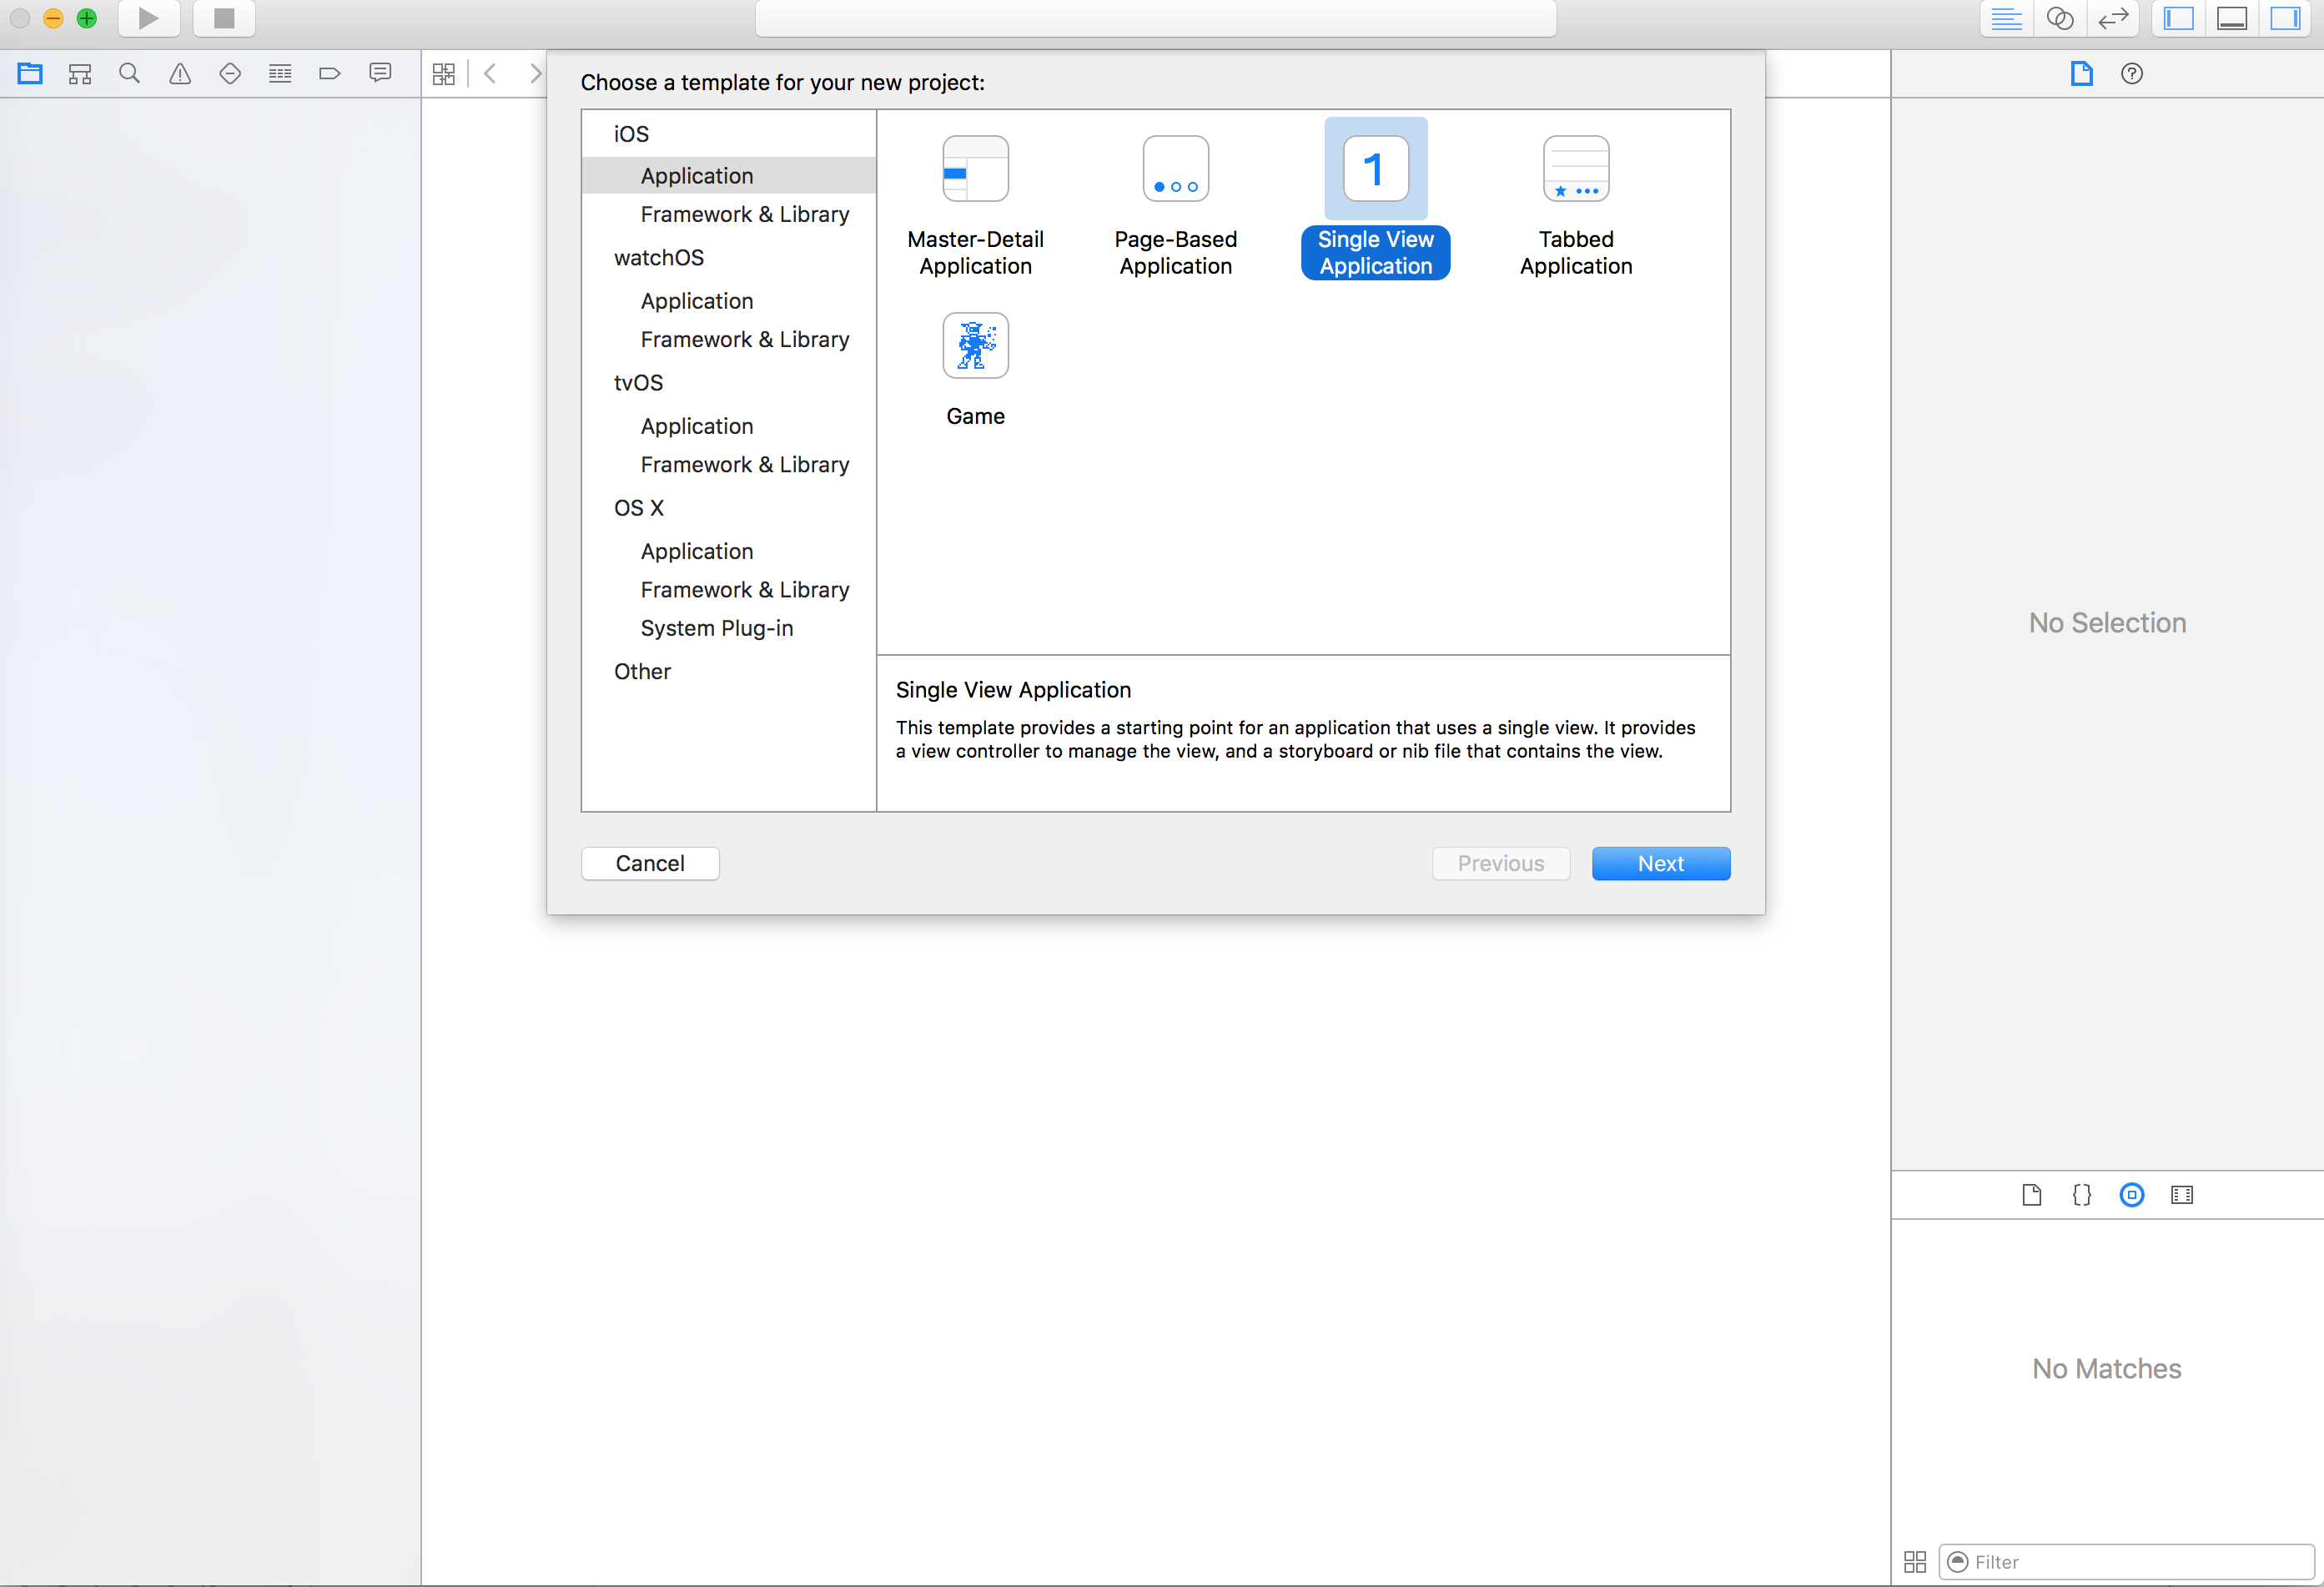

3. There is a navigation file bar on the most left side, and you should be able to see “Main.Storyboard” (graph 1). Storyboard is the place where you can do designs as well as interactions. There should be a default rectangular like iPhone screen showing up if you are in Storyboard. That is the default ViewController which basically is interface user can see in the real iPhone. If the app you are creating needs three interfaces, you need to create three ViewControllers. On this simple example, I just want to create an App called switchColor. There are two ViewControllers corresponding to two interfaces on this app. And there is one button on each ViewController to be used for switching background color. Let’s start do it.
Graph 1

4. Click the default viewController. On the right most sidebar of Xcode, you should see View setting (Graph 2). Then you can change the background color to Blue. Let’s also add a text on the screen. Type Label on the right bottom corner (Graph 3), then drag the label to your blue background view controller. By double clicking that label, you can change text to whatever you want. Let’s change it to “ Hello World ! ” .
Graph 2 
Graph 3

5. Let’s create another ViewController to represent another interface on the app. You can simply copy and paste old ViewController by pressing Command C + Command V or add a new viewController as the way we added Label. Then let’s change the background color of new viewController to Green.
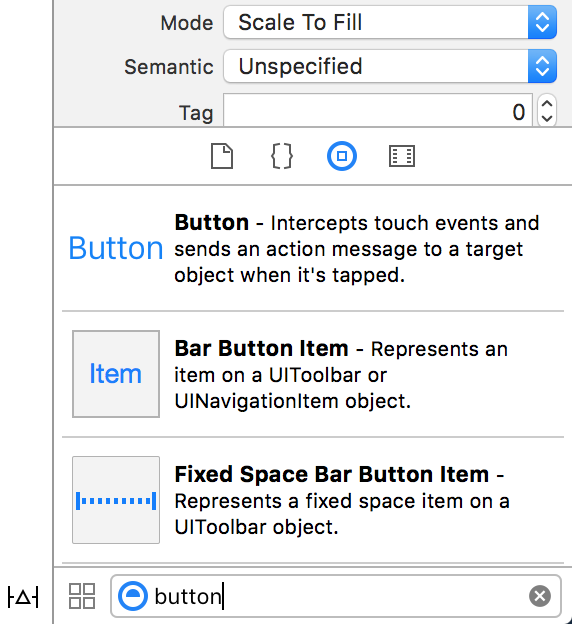
6. You should see two different background color viewControllers in Storyboard now. Let’s add some interactions on it. Type button on the right bottom box and drag a Button to your Blue ViewController (Graph 4). Do the exactly same step again for the Green ViewController. Double click those two Buttons on the Storyboard, and you can change the texts on the buttons. Let’s change the text of Blue one to “Switch to Green”, and change the text of Green one to “Switch to Blue”.
Graph 4
7. Final Step ! How do we add reactions for buttons ? Hold ‘control’ and click the Button you just created. If you try to drag the button to another ViewController, there will be an arrow showing up. You just need to point that arrow to the different ViewController (Graph 5). For example, you should click the “Switch to Green” button and drag the arrow from blue background ViewController to the green background ViewController as I show picture above. Then you need to do the same step for another ViewController such that your Storyboard should be like the picture I showed below.

Graph 5

The switching color App is done. You can run this app by clicking run button. If you click “Change to Green” button, the background will be changed to green. If you click “Change to Blue” button, the background will be changed to blue.
If you are interested doing Swift Programming and iOS app development, you can check Apple Swift Guide on https://developer.apple.com/library/content/documentation/Swift/Conceptual/Swift_Programming_Language/index.html#//apple_ref/doc/uid/TP40014097-CH3-ID0 .