Last time we covered the basics of Google’s official IDE for Android app development: Android Studio. You can find that article here. Now we will learn about how an Android app is structured and organized, what files interact with each other, and what they do.
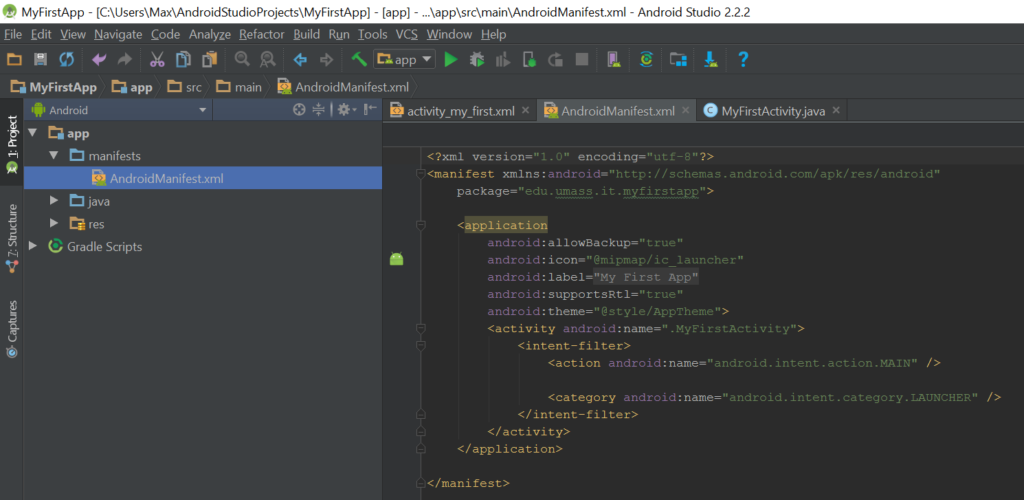
First, we will introduce some of the most important files in your Android App. Your app has three main folders in it, manifests, java, and res. The manifests folder contains any manifest declarations you may have for your app – usually just the one we are about to introduce.
This is the AndroidManifest.xml file. It is an XML file that all Android apps need to have. It declares information such as the name of the app and, if necessary, any permissions the app will need to function. If, for example, you were to make an app that needed access to the device’s camera or microphone, or needed to save or view a file saved to the device, you will need to get permission from the user to access those things. These permissions would be declared in the AndroidManifest.xml file, and the Android OS will prompt the user for permission when it is needed. A good app should be able to function without access to permission-locked functions if the user chooses to deny the app permission. You can read more about working with system permissions on Android on the Android Developers site here. We will not be working with permissions in our first app.
The next main folder in your app is the java folder. This folder contains the domain-name-based package structure as declared when you created this project. The folders contain the Java classes for your project, as well as the test classes. The Java classes for your activities have XML layout files associated with them that reside in a different folder, which we will see later.
The last main folder is the res folder, which is short for resources. It contains the images, icons, and localized text for your app, as well as any other data that could be considered a resource. It contains a folder called mipmap that contains the many different-sized .png images for your app’s launcher icon.
One of the most important files in the res folder is the strings.xml file. It is another XML file that contains localized text for various entities in your app. The reason for having localized text is that it is bad practice to “hard-code” the text in your app. If you hard-code your entire app in English, someone who only speaks Russian will not be able to use it.
It is good practice to have all of the text on your app fetch their values from a string resource file, such as strings.xml. If your app supports other languages, there will instead be a strings.xml folder that contains strings.xml files inside for individual languages. Here is a sample res folder structure for an app that supports English, Spanish, and Russian.
Every resource in your app has an ID associated with it in a public class called R.java. R stands for resources. All of your app’s resources are accessible in R through different nested classes such as R.string, R.layout, etc. The text fields in your app can fetch their text values from the strings.xml file. Your app will fetch string resource values based on the system language of the device the app is running on, and whether or not the app supports that language. You can read more about fetching resources from R in Android on this Android Developers page.
Now we’re familiar with the different parts of an Android app, how they are organized, and how they interact with each other. Next time we will make a basic Android app. The app will ask the user for some input and show a Send button. The Send button will display the user’s input on the screen. We will learn about how entities are arranged on an Activity, how text is localized for different languages, how to read content from an editable field, how to trigger a button action, and how to switch between different Activities.

